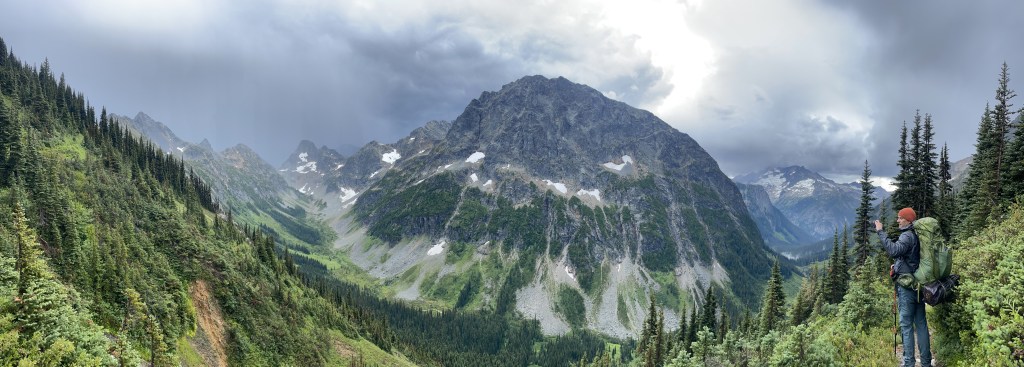
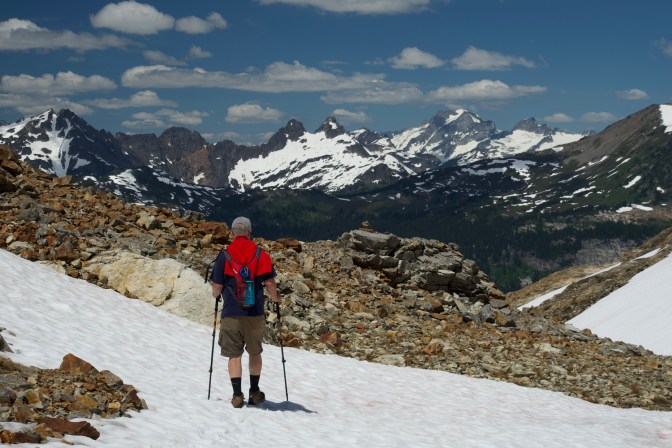
Peter snaps a photo near the summit of Easy Pass (Photo by Bob Swenson)
EASY PASS – Before we get started, let’s just make one thing clear: There’s nothing “easy” about the hike to Easy Pass.
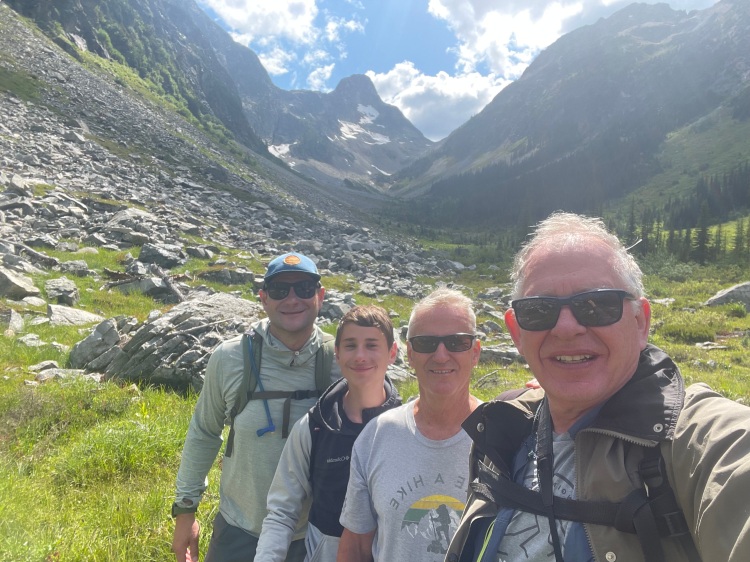
From left, the Fab Four: Peter Richardson, Isaac Richardson, Rick Lund and Bob Swenson.
Sure, the clearly-marked sign off Highway 20 is easy to spot. The trailhead, unlike many starting points for hikes, is easily accessible, just a short, paved road from the highway.
After that? Easy doesn’t do it.
It’s a 3,000-foot climb to the pass. That’s a tough slog for even the hardiest of day hikers. Our group of four – which included my son-in-law Peter, his 11-year-old son Isaac and longtime friend and hiking fanatic Bob “Next Ridge” Swenson – would carry weighty overnight packs up to the summit and down 1,275 feet to our camp at Fisher Creek. With the return trip, that’s a minimum elevation gain of nearly 4,300 feet.
Why Easy Pass? Believe it or not, our original plan was even a more difficult hike to Lake Byrne. That trail along picturesque Lost Creek Ridge in the shadow of Glacier Peak has long been on my bucket list. But Bob, after looking at the topographical map, convinced me to pull the plug on that one.
Even so, this hike would be our group’s most challenging. To paraphrase the title of a popular Eagles song, I had a peaceful, yet uneasy feeling.
Who named this pass? And what were they thinking?
After crossing Easy Pass Creek, the trail to Easy Pass breaks out from the forest and follows an exposed, talus slope up to the 6,525-foot summit. (Photo by Rick Lund)Wildflowers along the trail to Easy Pass. (Photo by Bob Swenson)
Apparently, someone was trying to be funny. According to historical accounts, the trail was a prospecting route to mines. It was a sarcastic name because there was no “easy route” across the ridge.
No one in our group was laughing when Mother Nature threw us a curve ball on this 27th day nof July on the steepest part of the trail. Just as we were making our way up the final set of exposed switchbacks to the summit, an unexpected thunderstorm rolled through. What started as a drizzle, eventually turned into a driving hailstorm. Even though no rain had been in the forecast, we were caught off-guard. We had not packed rain ponchos.
As we hauled our wet gear to the top and found what little shelter there was under scruffy, wind-whipped trees, Peter, a strong hiker and fearless in many ways, had a look of horror on his face.
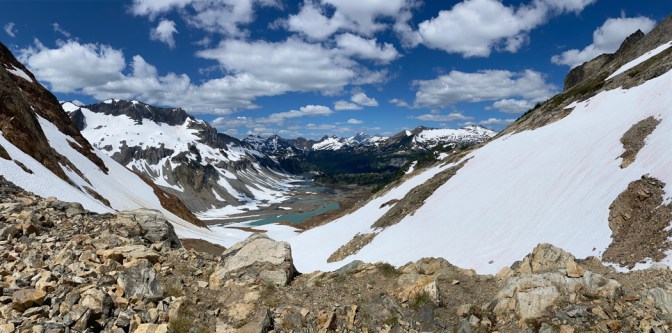
Looking at Fisher Peak and the Fisher Creek basin from the summit of Easy Pass shortly after a thunderstorm passed through. (Photo by Bob Swenson)
“I was not prepared for this,” he said, as he nervously rubbed Isaac’s hands, which had gone numb from the sudden drop in temperature.
Even with dark clouds overhead, however, the views were amazing. Standing at the 6,525-foot summit, you’re reminded why you hike in the first place. Your feet have taken you where few people go.
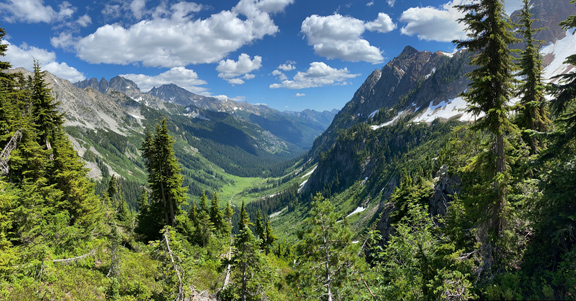
The view to the west, into the heart of North Cascades National Park, is absolutely stunning. With glaciated Mount Logan in the distance, the lush-green valley below runs as far as the eye can see. Looking south, a stream-carved basin leads to snow-topped Fisher Peak. To the east are Golden Horn and Mount Henry, two peaks that straddle the Pacific Crest National Scenic Trail.
Most hikers at this point take their time savoring the views, have lunch, and then make their way back to the trailhead for what amounts to a seven-mile, round trip. The outliers here, we continued down the other side – frozen fingers, soaked backpacks and all – to Fisher Creek Camp, where we had reserved one of three campsites for two nights.
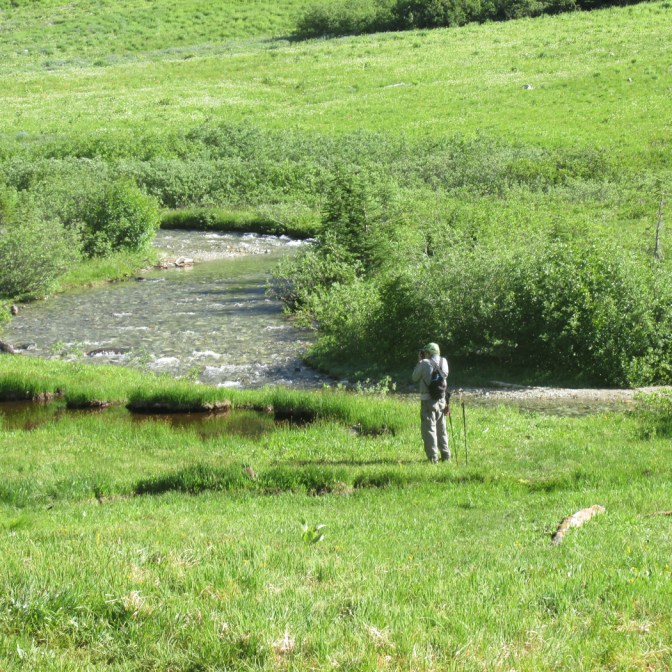
Peter and Isaac forge Fisher Creek to explore the meadow. (Photo by Rick Lund)
A day of exploring
We woke up to sun on Day 2. Hanging our wet clothes out to dry, we donned light day packs to explore nearby Fisher Creek basin.
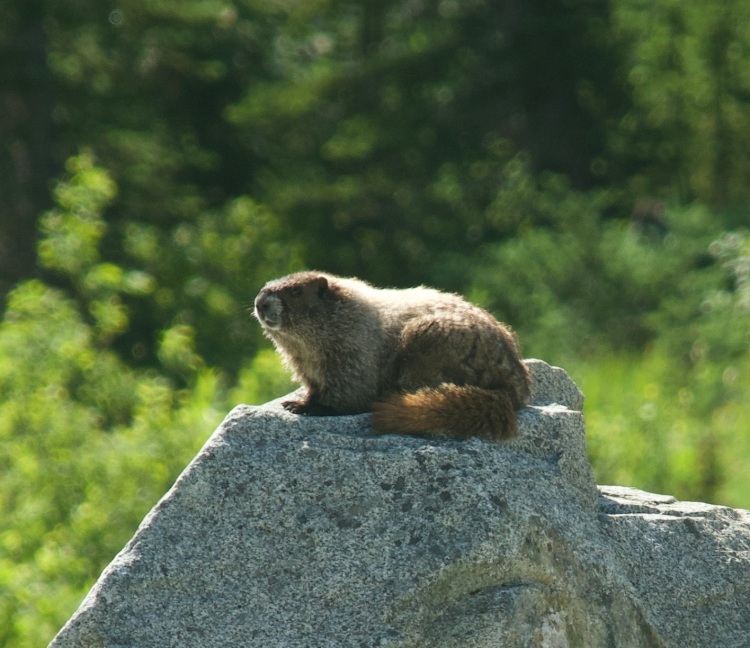
A marmot basks in the sun on a boulder in the Fisher Creek basin. (Photo by Bob Swenson)
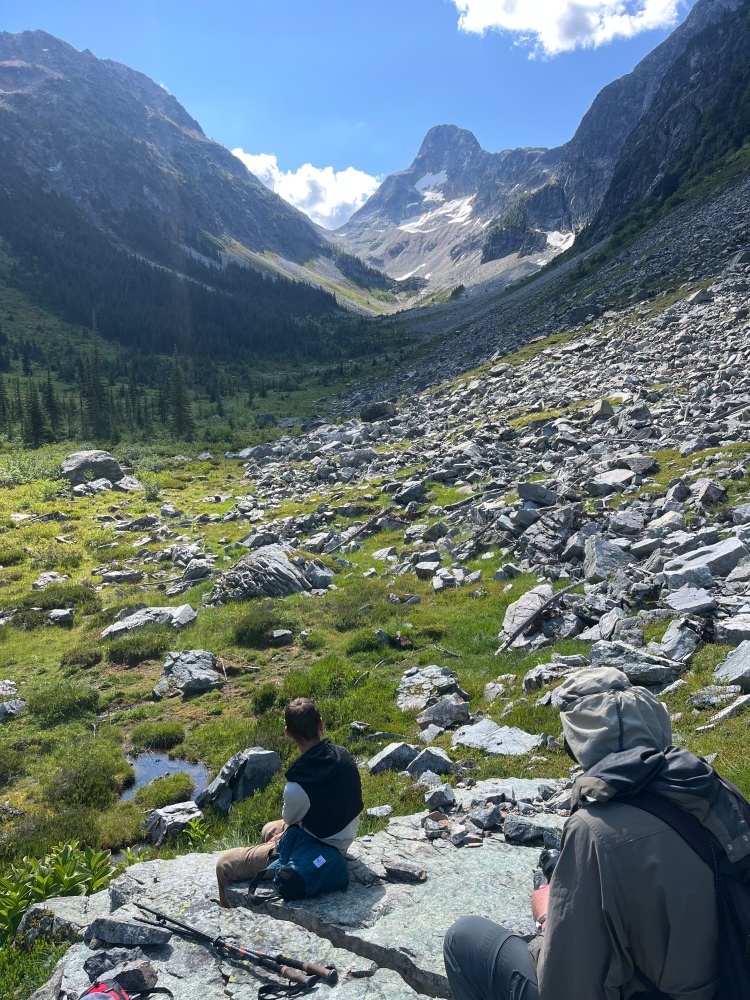
The more lightly-traveled trail from the junction just east of camp hugs the forest for a few hundred yards, before breaking out into a vast Alpine meadow that is nothing short of spectacular. We took pictures of wildflowers, took selfies and lounged on giant-sized boulders and ate our lunch as marmots scurried nearby.
Towering high above the meadow that ends in a mountain version of a cul-de-sac is 8,060-foot Fisher Peak. Looking back to where we came from, the sun glistened off 8,795-foot Mesahchie Peak. We could also see the switchbacks of the trail that would take us up and over Easy Pass the next morning.
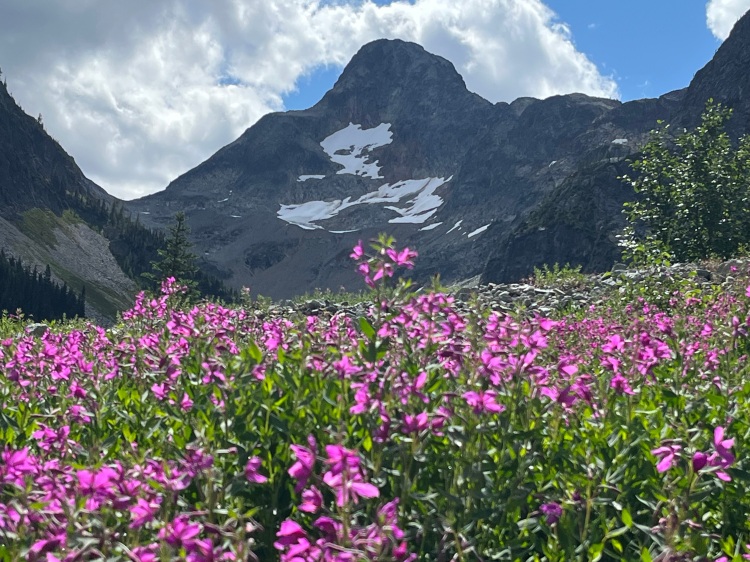
Wildflowers in the Fisher Creek basin frame 8,060-foot Fisher Peak in the background. (Photo by Rick Lund)Looking down the Fisher Creek basin to 8,795-foot Mesahchie Peak. (Photo by Bob Swenson)Fisher Creek meanders through the beautiful Alpine meadow that is Fisher Creek basin. (Photo by Bob Swenson)Having a lunch on a table-topped boulder in Fisher Creek basin, with 8,060-foot Fisher Peak in the background. (Photo by Rick Lund)
We also met backpackers on this side of Easy Pass who, like us, were here for extended stays. A few were headed farther up the Fisher Creek basin to Silent Lakes. Others were even more ambitious. We met backpackers who had dropped cars off on two locations, so as to make the trip one-way. A wilderness ranger checking overnight permits had started at Colonial Creek and was headed to the Easy Pass trailhead, for a total trip of 24 miles. Another group had started at the Panther Creek trailhead. Their final destination at the trailhead off Highway 20 completed a 33-mile journey.
One step at a time
I had struggled two days earlier ascending Easy Pass, having to stop frequently to catch my breath. The return trip over the pass was also challenging. About halfway up, Bob gave made some good advice.
“Try setting step goals,” he said. “For example, tell yourself you’re going to take 25 steps before resting. That way, you’re counting steps and not thinking about how far you have to go.”
On Day 3 we make our way back up to Easy Pass. (Photo by Bob Swenson)
I started out at 25 steps, then 35, before working my way to 50. Eventually, I was counting 100 steps before resting. Before I knew it, I was making great progress. Like Bob said, it took my focus off of looking at the summit and realizing how far I had to go.
Isn’t that how life is? The older I get, the more I understand that growth is incremental. The key is discipline. This can be true of an exercise regiment or a diet plan. You cannot meet your weight goal or get fit overnight. As a Christian, I have found that daily time spent in God’s Word and prayer has a stacking-bricks effect. It’s the accumulation of days that ultimately stimulates lasting growth and liberates potential. There are no short cuts.
Rick makes his way down the Easy Pass trail on talus slopes on the way back to the trailhead. (Photo by Bob Swenson)
There were certainly no quick fixes or short cuts back to the trailhead. It took us about seven hours from the Fisher Creek Camp to make our way back. In the parking lot, I had a conversation with a couple younger day hikers from Oregon we had met earlier in the day at the Easy Pass summit.
As I removed my overnight pack, one of the women exclaimed, “That was a tough day hike, one of the tougher ones I’ve done. I can’t imagine hauling a backpack up there.”
Easy? No. Worth it? Definitely.
A Buck we named “Velvet” was a frequent visitor at the Fisher Creek Camp. Here, Isaac offers him some “leafy greens.” (Photo by Rick Lund)
Veteran fire lookout watchman Jim Henterly looks through the “Osborne Fire Finder” in the iconic Desolation Peak fire lookout in North Cascades National Park (Photo courtesy of Jim Henterly)
Doing a story on a fire lookout watchman has long been on my bucket list. I can now check that box.
I have to say, though, this was not an easy story to do. First of all, only about a third of the state’s remaining 93 fire lookouts are staffed. I talked to several rangers with the U.S. Forest Service. No dice. Finally, one ranger suggested I contact North Cascades National Park. A spokesperson with the park directed me to the guy who mans the famous Desolation Peak fire lookout, which also happens to be the only one in the park that is staffed.
My intent was to hike to the lookout for the story. But I soon discovered that was going to be challenging. It’s roughly 50 miles round trip from the Ross Lake east bank trailhead off Highway 20. An easier option is to take a water taxi from Ross Lake Resort to Lightning Creek Campground. That puts you at the trailhead to Desolation Peak, a 4,400-foot climb in elevation over 4.7 miles. But the water taxi option comes at a price — $145 each way — thereby gobbling up much of the money I was to be paid for this story.
So I reached out to Desolation’s watchman, Jim Henterly, by phone. At first he was reluctant to be interviewed. He thought other reporters from various media had misrepresented him. He gradually warmed up to me. He was a wealth of information and a great quote.
Oh, and Desolation Peak isn’t just any fire lookout.
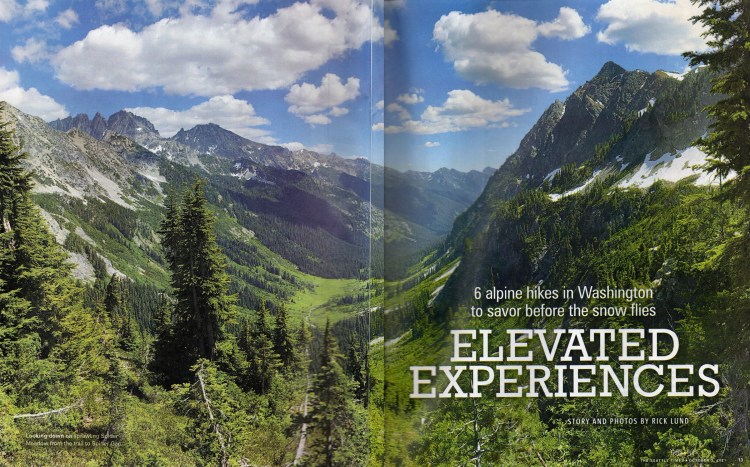
The opening inside spread of my hiking piece for Pacific NW magazine.
The Seattle Times’ Pacific NW magazine in October published my story on a collection of fall hikes. It was a nice, 12-page spread designed by the magazine’s art director, David Miller and edited by Bill Reader, the mag’s editor. “D-Mill” and I worked together at The Times for more than 30 years, Bill and I for about 20 years.
The cover. That’s my brother-in-law, Kent Oldenburger, making his way on the Maple Pass Loop trail.
In assigning this story, Bill also asked me to write a “backstory,” a short page 2 piece that usually accompanies the front-page story. It’s supposed to offer some insight about the author and the “story behind the story.” Well, here’s a backstory to the backstory.
In the backstory for The Times, I wrote about my introduction to backpacking that we remember several decades ago as “The Starvation Hike,” a 55-mile slog through Olympic National Park that unexpectedly whetted my appetite for a lifetime of hiking. The unnamed family in the article was the Virtas, who became lifelong friends with my family beginning in the 1960s. The “other family” in the story responsible for food planning? They will remain nameless.
My dad was a banker for Seattle First National Bank. In 1963 he was transferred from the Mount Vernon branch to Monroe. We met the Virta family at the church we began attending. I instantly became best buds with the Virtas’ oldest son, David. We shared a love of sports – first and foremost – and just seemed to bond on every level.
But our time in Monroe was short-lived. In 1966 my dad was transferred, yet again, this time to the Sea-First branch in Sedro-Woolley. The day my dad broke the news at the dinner table we were moving from Monroe I broke down and cried. I had just finished the fourth grade. David was my best friend.
Despite being separated by an hour’s drive, our families remained good friends. In high school, David was quite the football player at Monroe, while my basketball-playing career was more modest at Sedro. We would occasionally hook up in Seattle to watch our beloved SuperSonics, or attend a UW game.
When it came time for college, David went to Seattle Pacific, I to North Park College in Chicago. Still, we managed to find time to get together. He was always kind and gentle, and loved to laugh. When Vicki and I were married in 1977, David was one of my groomsmen. We saw each other as often as we could in our adult years, even though we sometimes lived in different states.
David Virta, pictured here in his groomsman attire at in our wedding in 1977. He is flanked by my sister, Cindy, on the left, and David’s sister, Kerry, on the right.
Then in the mid-1980s, David was admitted to UW Hospital. Surgeons removed a suspicious-looking mole on his back. He was diagnosed with melanoma. I visited him at the hospital. Still, everything seemed to be fine.
Several years later, I got a call from his parents. The melanoma cancer had spread to other parts of his body. December of 1997 was the last time I saw him. I visited him at his folks’ Monroe home, where he was in hospice care. Hooked up with tubes, and struggling to breath, he couldn’t really communicate with me. But he was fully aware of my presence and what I was saying to him. I don’t remember everything I said to him on that day. But I did tell him I loved him, and that he was the best friend I ever had. It was emotional.
David would pass away a couple weeks later, 24 years ago this month (December). He was just 44 years old. I spoke at his funeral. Sadly, not even three years later, David’s dad, Bob, died from the same aggressive cancer.
So as I wrote the “backstory” piece for the hiking story, not only was I thankful for the lifelong friendship with the Virta family that introduced me to backpacking, I was also thankful for the big, gentle man in the family who would become my best friend. I still miss him to this day.
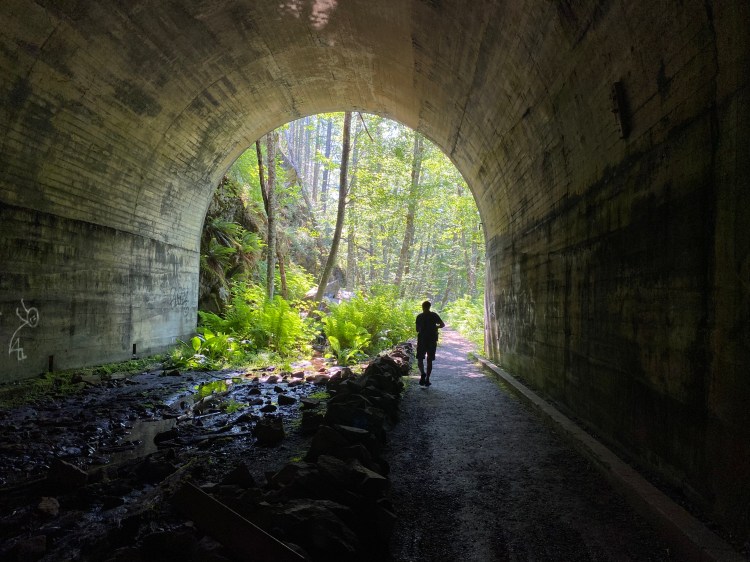
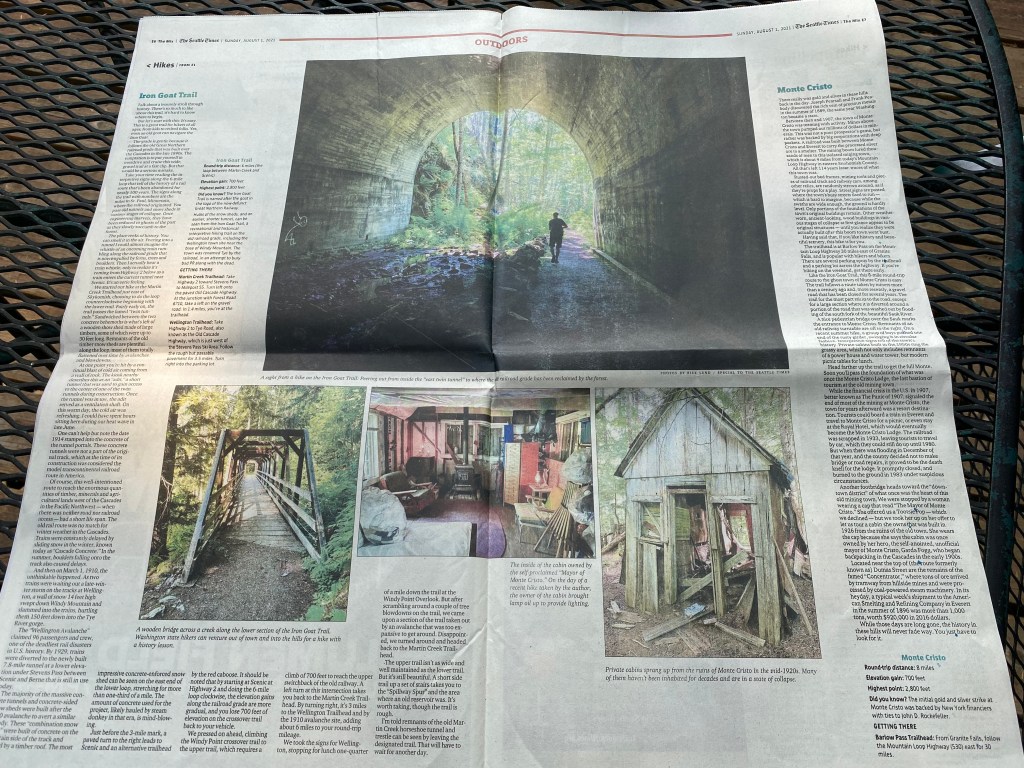
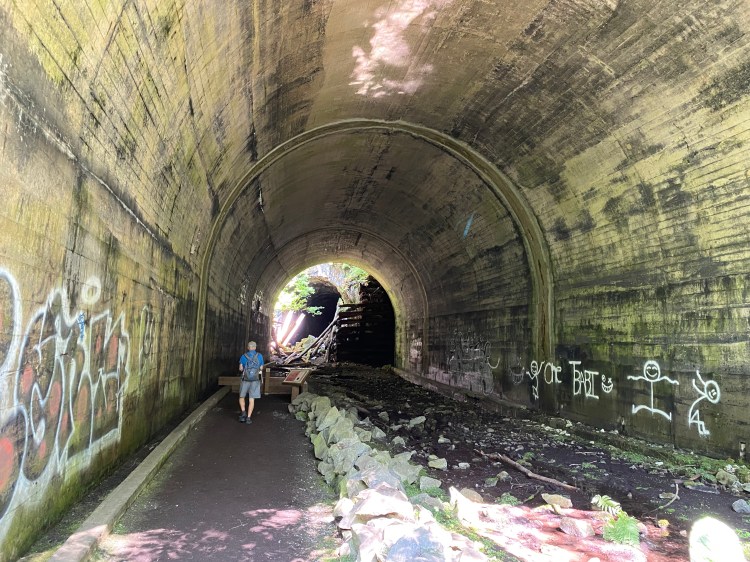
Peering out from inside the “east twin tunnel” to where the old railroad grade has been reclaimed by the forest.
This was a story that was decades in the making. As a young boy, I remember riding in the car over Stevens Pass and my dad pointing out, “you see those collapsed snowsheds over there? An avalanche of snow wiped out a passenger train, and many people lost their lives.”
Got some layout love from my former Seattle Times colleague, Stephanie Hays. She’s very talented.
So when Seattle Times Features Editor Stefanie Loh pitched a story idea to me about “hiking for history buffs” I knew exactly where I wanted to go – the “Iron Goat Trail” that follows the ill-fated Great Northern Railway route built in the late 1800s. I never made it to the actual spot where the 1910 “Wellington Avalanche” took out an awaiting passenger train named the “Spokane Express.” But I was in the vicinity, imagining what life was like when trains rumbled across the side of Windy Mountain on their way to the West.
For the second “history hike,” I chose to travel to the ghost town of Monte Cristo. In its heyday, in the late 1890s, this old mining town pumped out millions of dollars of silver ore.
The story jumped to a centerspread, or what we call in the journalism business, a double truck.
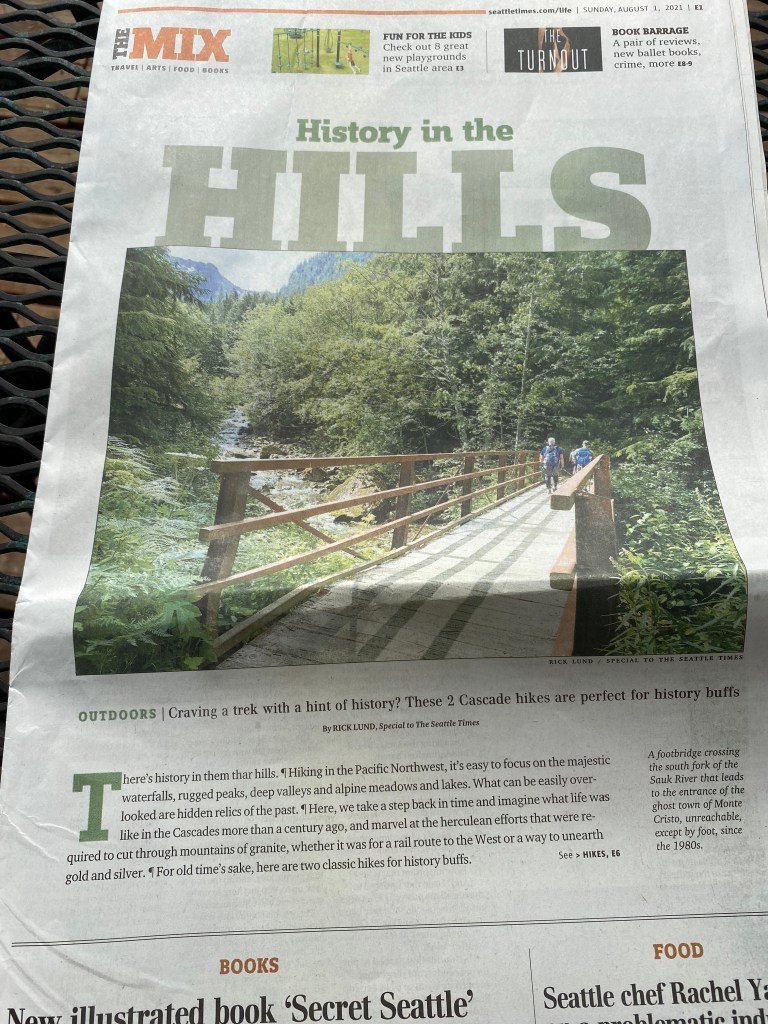
The story was published August 1 on the cover of the Mix section of the Sunday Times.
Many thanks to my hiking companions: Jeff Whidden, who accompanied this old goat to the Iron Goat Trail; and Bill Cheney, my partner on the trail to Monte Cristo. Together, we experienced the full Monte. As much as I enjoyed these walks through history, it was the conversations along the trail I treasured most.
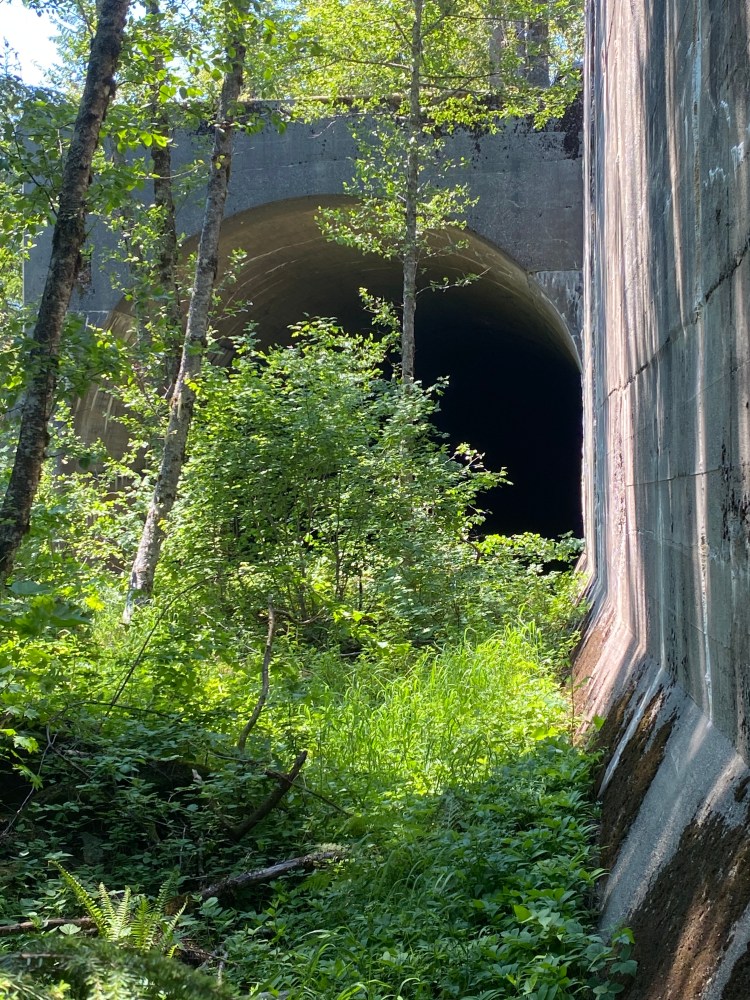
The old railroad grade leading out of this tunnel has been reclaimed by the forest.
By Rick Lund Special to The Seattle Times
There’s history in them thar hills.
Hiking in the Pacific Northwest, it’s easy to focus on the majestic waterfalls, rugged peaks, deep valleys and Alpine meadows and lakes. What can be easily overlooked are hidden relics of the past.
Here, we take a step back in time and imagine what life was like in the Cascades more than a century ago, and marvel at the herculean efforts that were required to cut through mountains of granite, whether it was for a rail route to the West or a way to unearth gold and silver.
For old times sake, here’s two classic hikes for history buffs:
Iron Goat Trail
Talk about a leisurely stroll through history. There’s so much to like about this trail, it’s hard to know where to begin.
But let’s start with this: It’s easy. This is a great trail for hikers of all ages, from kids to retired folks. Yes, even an old goat can navigate the Iron Goat.
The old railroad grade in many places was blasted out through rock. In its place is a wide, easy-to-navigate gravel trail, including boardwalks over marshy areas. It’s easy to cruise here, as Jeff Whidden in this photo finds out.
The grade is gentle because it follows the old Great Northern railroad grade that was built over the Cascades in the late 1890s. The temptation is to put yourself in overdrive and cruise this wide, gravel trail at a fast clip. But that would be a serious mistake.
Signs along the trail with numbers signify the number of miles to St. Paul, Minnesota, where the railroad originated.
Flattened wooden snow sheds are all over the Iron Goat Trail.
Take your time reading the interpretive signs along the 6-mile loop that tell of the history of a rail route that’s been abandoned for nearly 100 years. The signs along the trail with numbers are the miles to St. Paul, Minnesota, where the railroad originated. You pass old tunnels and snowsheds in various stages of collapse. Once engineering marvels, they have been reduced to ghosts of the past as they slowly succumb to the forest.
The place reeks of history. You can smell it in the air. Peering into a tunnel I could almost imagine the whistle of an oncoming train rumbling along the railroad grade that is now engulfed by ferns, trees and boulders. Then I actually hear a train whistle, only to realize it’s coming from Highway 2 below as a train enters the current tunnel near Scenic. It’s an eerie feeling.
We started our hike at the Martin Creek trailhead just east of Skykomish, choosing to do the loop counter-clockwise beginning with the lower trail. Fairly early on, the trail passes the famed “twin tunnels.” Sandwiched between the two concrete behemoths is what’s left of a wooden show shed made of large timbers, some of which were up to 30 feet long. Remnants of the old timber snowsheds are plentiful along the loop, most of them totally flattened over time by avalanches and blowdowns.
At one point you’re hit by a continual blast of cold air coming from a wall of rock. The kiosk nearby describes this as an “adit,” a short tunnel that was used to gain access to the center of one of the twin tunnels during construction. Once the tunnel was in use, the adit served as a ventilation shaft. On this warm day, the cold air was refreshing. I could have spent hours sitting here during our heat wave in late June.
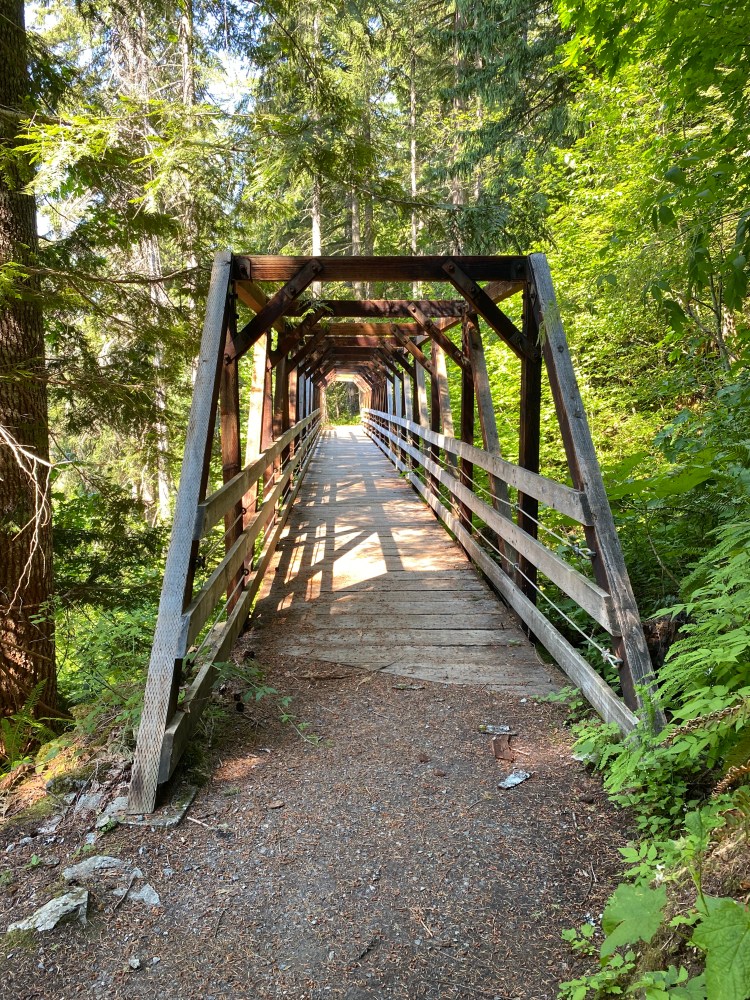
A wooden bridge crosses a creek along the lower section of the Iron Goat Trail.
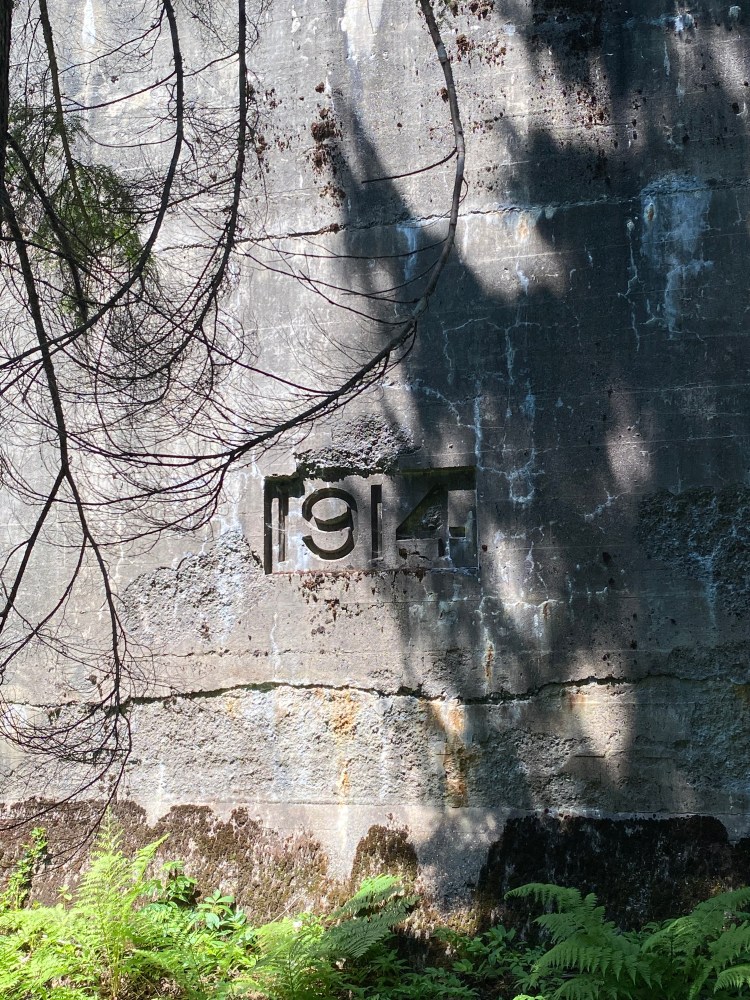
One can’t help but note the dates “1914” stamped into the concrete of the tunnel portals. These concrete tunnels were not a part of the original track, which at the time of its construction was considered the model transcontinental railroad route in America.
This concrete tunnel was built in 1914, four years after the Wellington avalanche disaster.
Of course, this well-intentioned route to reach the enormous quantities of timber, minerals and agricultural lands west of the Cascades in the Pacific Northwest — when there was neither road nor railroad access — had a short lifespan. The old rail route was no match for winter weather in the Cascades. Trains were constantly delayed by sliding snow in the winter, known today as “Cascade Concrete.” In the summer, falling boulders onto the track also caused delays.
And then on March 1, 1910, the unthinkable happened. As two trains were waiting out a late-winter storm on the tracks at Wellington, a wall of snow 14 feet high swept down Windy Mountain and slammed into the trains, hurtling them 150 feet down into the Tye River gorge.
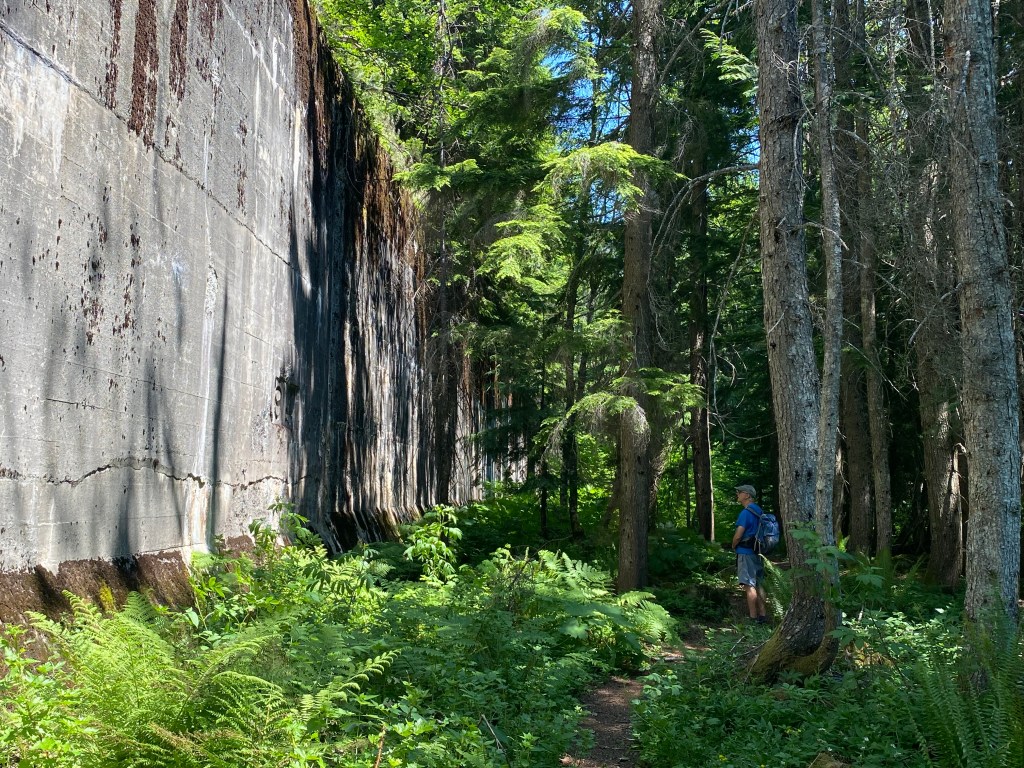
The concrete wall stands as a silent reminder of the fearsome conditions that finally drove the Great Northern Railway off Windy Mountain. This “combination snow shed” featured a concrete wall on one side, covered by a timber roof. On the other side, the snow shed rested on large concrete footings.
The “Wellington Avalanche” claimed 96 passengers and crew, one of the deadliest rail disasters in U.S. history. By 1929 trains were diverted to the newly-built 7.8-mile tunnel at a lower elevation under Stevens Pass between Scenic and Berne that is still in use today.
The majority of the massive concrete tunnels and concrete-sided snow sheds were built after the 1910 avalanche to avert a similar tragedy. These “combination snow sheds” were built of concrete on the mountain side of the track and covered by a timber roof. The most impressive concrete-enforced snowshed can be seen on the east end of the lower loop, stretching for more than one-third of a mile. The amount of concrete used for the project, likely hauled by steam donkey in that era, is mind boggling.
Just before the 3-mile mark, a paved turn to the right leads to Scenic and an alternative trailhead by the red caboose. It should be noted that by starting at Scenic at Highway 2 and doing the 6-mile loop clockwise, the elevation gains along the railroad grade are more gradual, and you lose 700 feet of elevation on the crossover trail back to your vehicle.
Jeff Whidden stands in awe of this concrete wall to a former snow shed that stretches for more than a third of a mile. One of the “twin tunnels” along the lower trail. The tunnels were separated by a wooden show shed, which you can see here has deteriorated. The gap was left between to allow for men and equipment to work if the single-track tunnel were ever widened to a double-track. It’s been many years since trains rumbled through these tunnel portals.
We pressed on ahead, climbing the Windy Point crossover trail to the upper trail, which requires a climb of 700 feet to reach the upper switchback of the old railway. A left turn at this intersection takes you back to the Martin Creek trailhead. By turning right, it’s 3 miles to the Wellington trailhead and by the 1910 avalanche site, adding about 6 miles to your round trip.
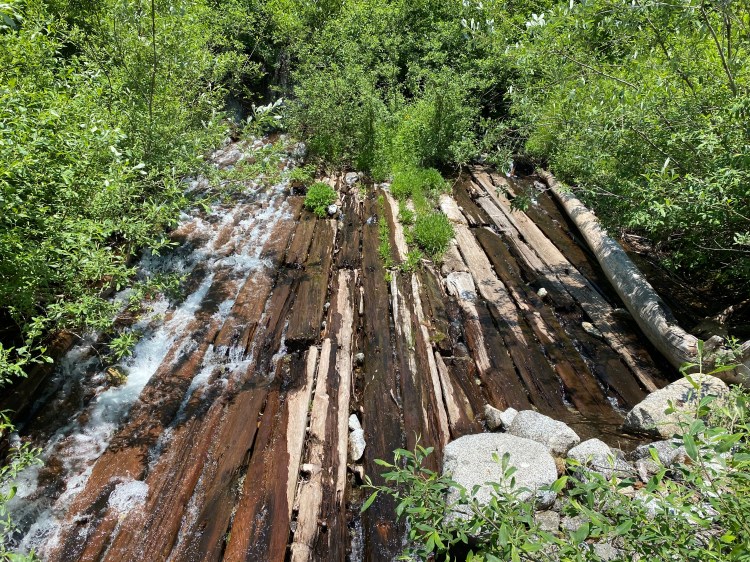
A primitive timber spillway leads to a reservoir that was used for fire protection for the Great Northern Railway.
We took the signs for Wellington, stopping for lunch a quarter of a mile down the trail at the Windy Pt. overlook. But after scrambling around a couple tree blowdowns on the trail, we came upon a section of the trail taken out by an avalanche that was too expansive to get around. Disappointed, we turned around and headed back to the Martin Creek trailhead.
The upper trail isn’t as wide and well-maintained as the lower trail. But it’s still beautiful. A short side trail up a set of stairs takes you to the “Spillway Spur” and where an old reservoir was. It’s worth taking, though the trail is rough.
I’m told remants of the old Martin Creek horseshoe tunnel and trestle can be seen by leaving the designated trail. That will have to wait for another day.
About the Iron Goat Trail
Distance: 6 miles round trip (the loop between Martin Creek and Scenic) Elevation gain: 700 feet. Highest point: 2,800 feet. Did you know? The Iron Goat Trail is named after the goat in the logo of the now-defunct Great Northern Railway. GETTING THERE Martin Creek trailhead: Take Highway 2 toward Stevens Pass to Milepost 55. Turn left onto the paved Old Cascade Highway. At the junction with Forest Road 6710, take a left on the gravel road. In 1.4 miles, you’re at the trailhead. Wellington trailhead: Take Highway 2 to Tye Road, also known as the Old Cascade Highway, which is just west of the Stevens Pass Ski Area. Follow the rough but passable pavement for 3.5 miles. Turn right into the parking lot.
Monte Cristo
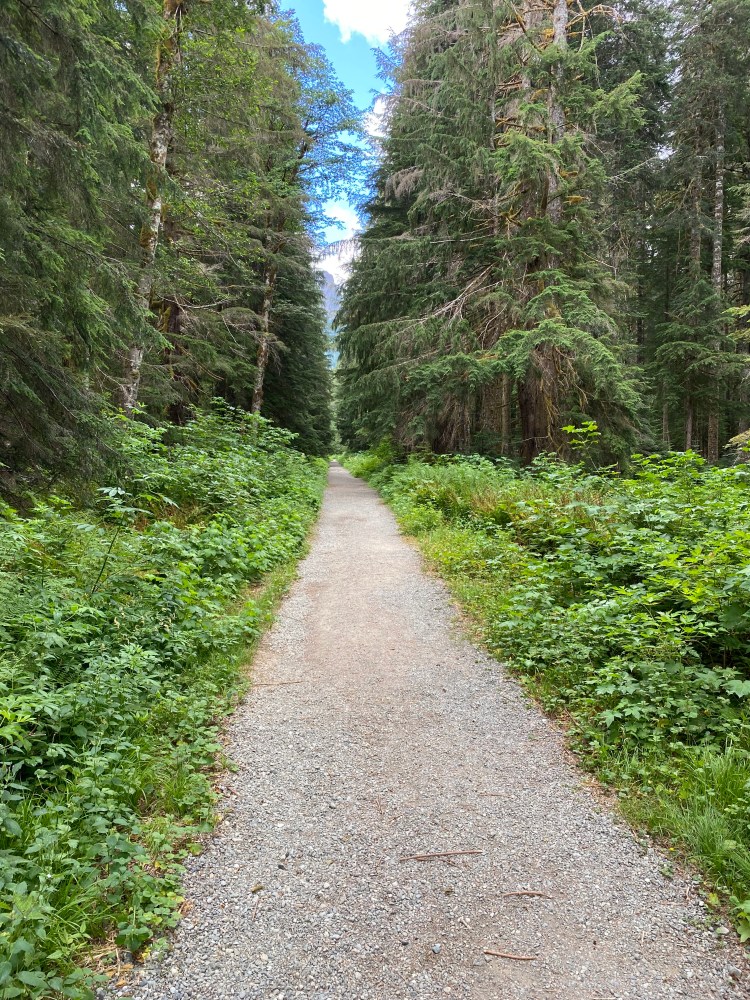
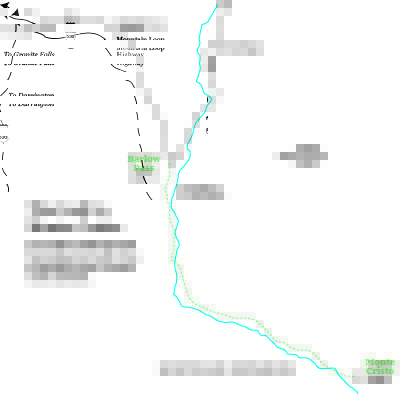
The 4-mile trail from Barlow Pass on the Mountain Loop Highway to Monte Cristo follows a road that has been closed for several years. The trail, which is also popular with bikers, for the most part sticks to the road, except for a portion early on where it is diverted around a portion of the road that was washed out by flooding of the south fork of the Sauk River.
There really was gold and silver in these hills back in the day. Joe Pearsall and Frank Peabody discovered the rich vein of precious metals in the summer of 1889, the same year Washington became a state.
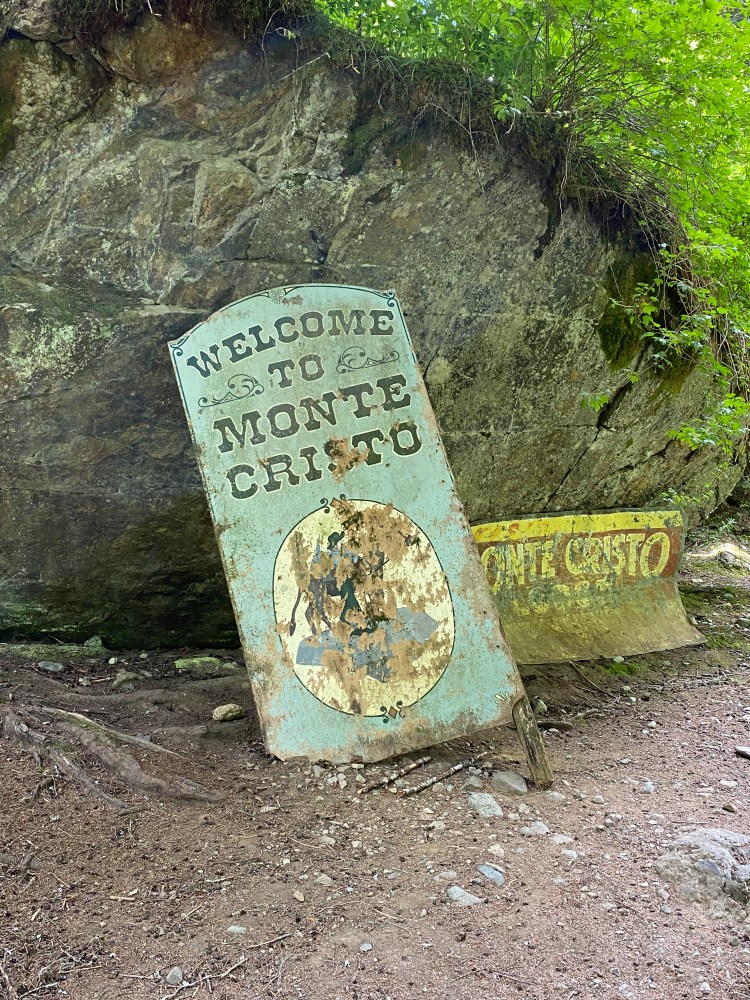
The iconic sign near the entrance to the ghost town of Monte Cristo, which was a hub of activity following the discovery of gold and silver ore in 1889.
Between then and 1907, the town of Monte Cristo was teeming with activity. Mines above the town pumped out millions of dollars in minerals. This was not a poor prospector’s game, but rather was backed by big corporations with deep pockets. A railroad was built between Monte Cristo and Everett to carry the processed silver ore to a smelter. The mining boom lured thousands of men to this isolated mining town, which is about four miles from today’s Mountain Loop Highway in eastern Snohomish County.
All that’s left 114 years later are traces of what this town was.
Rusted-out bed frames, mining tools and pieces of railroad track and railway cars and other relics are randomly strewn around, as if they’re props for a play. Street signs are posted where the town’s busy streets used to run – which is hard to imagine, because while the swaths are wide enough, the ground is hardly level. Only portions of the foundations of the town’s original buildings remain. Other weather-worn, ancient-looking, wood buildings in various stages of collapse at first glance appear to be original structures — until you realize they were actually built after this boom town went bust.
Having said that, if you like history and beautiful scenery, this hike is for you.
Cabins built in the 1950s ring the “outskirts” of the old town of Monte Cristo.
The trailhead is at Barlow Pass on the Mountain Loop Highway 30 miles east of Granite Falls, and is popular with hikers and bikers. There’s several parking spots by the trailhead and a parking lot across the highway. If you’re hiking on the weekend, get there early.
Like the Iron Goat Trail, this 8-mile round trip to the ghost town of Monte Cristo is easy. The trail follows a route taken by miners more than a century ago and, more recently, a gravel road that has been closed for several years. The trail for the most part sticks to the road, except for a large section where it is diverted around a portion of the road that was washed out by flooding of the south fork of the beautiful Sauk River.
A foot bridge crossing the south fork of the Sauk River that leads to the entrance of the ghost town of Monte Cristo.
A nice, pedestrian bridge over the Sauk marks the entrance to Monte Cristo. Remnants of an old railway turntable are off to the right. A group of boys pushes one end of the rusty girder, swinging it in circular fashion. Interpretive signs tell of the town’s history. Private cabins built in the 1950s ring the grassy area, which not only includes remnants of a power house and water tower, but modern picnic tables for lunch.
The remnants of a railway turntable. The ore was caried by the Monte Cristo Railway all the way to the American Smelting and Refining Company in Everett for final processing.
Tourists could still reach the town of Monte Cristo by car up until 1980. But after flooding in December of that year, and Snohomish County’s decision not to make bridge or road repairs, the Monte Cristo Lodge closed for good. It burned to the ground in 1983 under suspicious circumstances.
Head farther up the trail to get the full Monte. Soon you’ll pass the foundation of what was once the Monte Cristo Lodge, the last bastion of tourism at the old mining town.
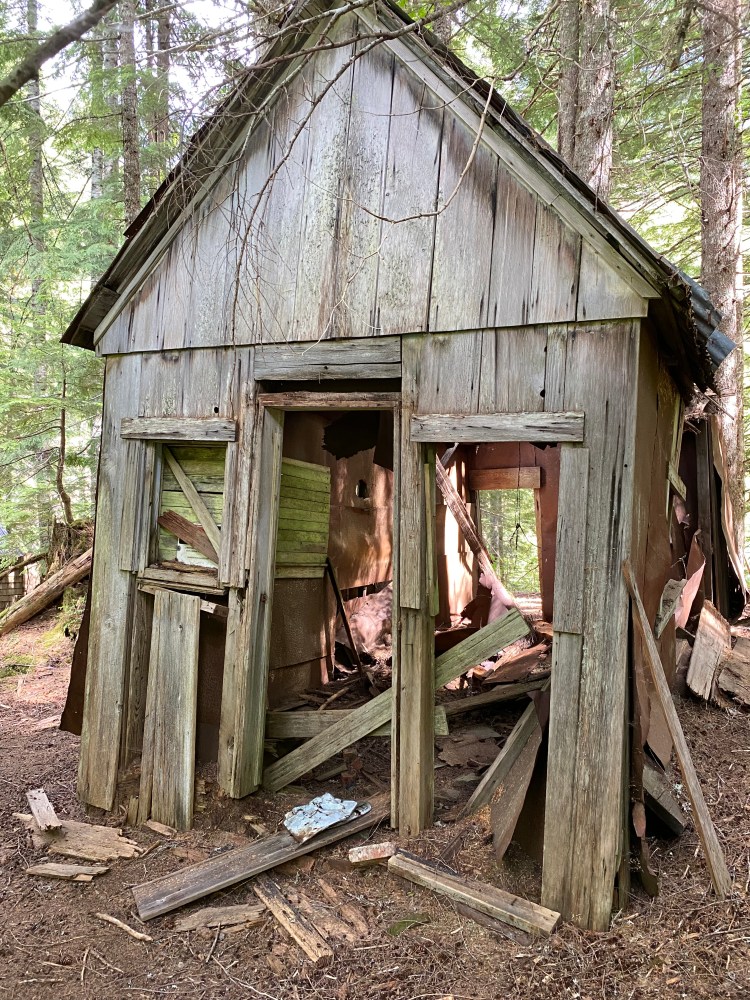
Private cabins sprang up from the ruins of Monte Cristo in the mid-1920s. Many of them haven’t been inhabited for decades and are in a state of collapse.
While the financial crisis in the U.S. in 1907, better known as “The Panic of 1907,” signaled the end of most of the mining at Monte Cristo, the town for years afterward was a resort destination. Tourists could board a train in Everett and travel to Monte Cristo for a picnic, or even stay at the Royal Hotel, which would eventually become the Monte Cristo Lodge. The railroad was scrapped in 1933, leaving tourists to travel by car, which they could still do up until 1980. But when there was flooding in December of that year, and the county decided not to make bridge or road repairs, it proved to be the death knell for the lodge. It promptly closed, and burned to the ground in 1983 under suspicious circumstances.
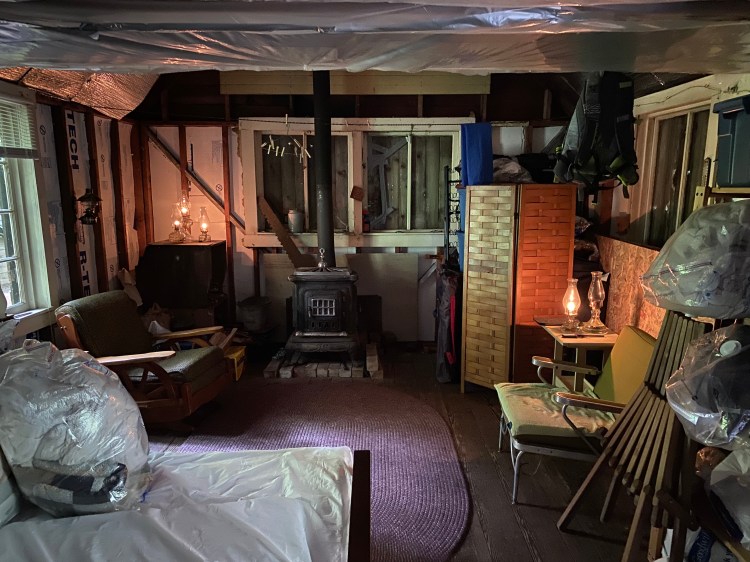
Another foot bridge heads toward the “downtown district” of once was the heart of this old mining town. We’re stopped by a woman wearing a cap that read “The Mayor of Monte Cristo.” She offered us a tootsie pop — which we declined — but we took her up on her offer to let us tour a cabin she owns that was built in 1926 from the ruins of the old town. She wears the cap because she says the cabin was once owned by her hero, the self-annointed, unofficial mayor of Monte Cristo, Garda Fogg, who began backpacking in the Cascades in the early 1900s.
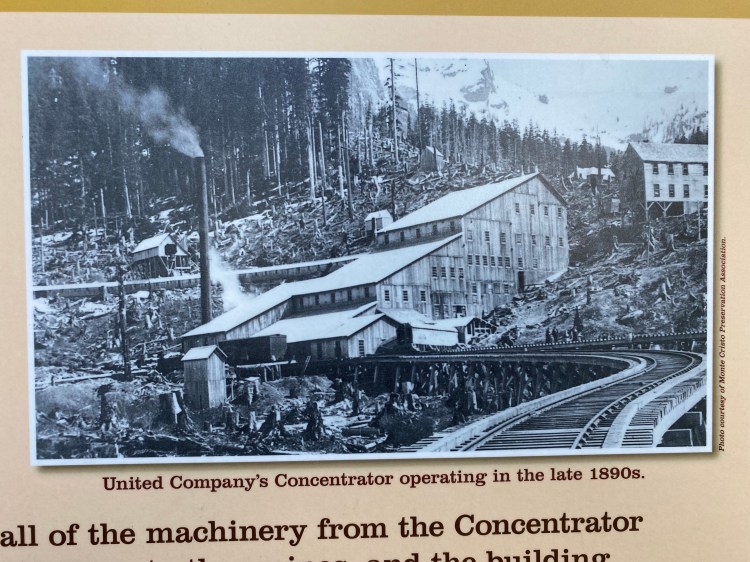
Located near the top of (the route formerly known as ) “Dumas Street” is the remains of the famed “Concentrator,” where tons of ore arrived by tramway from hillside mines and were processed by coal-powered steam machinery. In its heyday, a typical week’s shipment to the American Smelting and Refining Company in Everett in the summer of 1896 was more than 1,000 tons, worth $920,000 in 2016 dollars.
While those days are long gone, the history in these hills will never fade away. You just have to look for it.
Rick Lund is a former assistant sports editor with The Seattle Times
The owner of the”Mayor’s Cabin” we met along the trail brought lamp oil up that day to provide lighting.
This cabin was built in 1926 from the ruins of Monte Cristo. It is owned by the self-proclaimed “Mayor of Monte Cristo.”
The remains of the foundadtion for the “Concentrator” that processed tons of silver ore.
What the “Concentrator” looked like in its heyday.
A rusted-out wheel near the “Concentrator.” Silver ore was taken by tram off the hillside, then by railway to Everett.
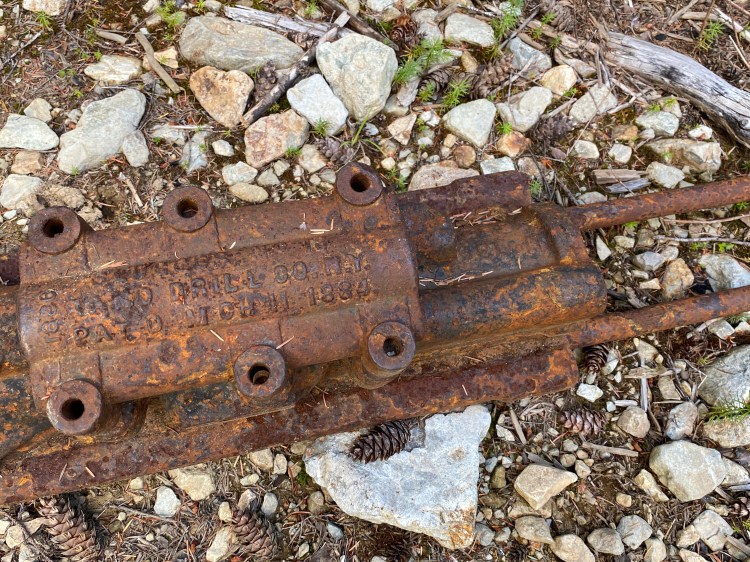
Expensive drilling was required to bore through rock. This appears to be a drill that was built in 1884.
About Monte Cristo
Distance: 8 miles round trip. Elevation gain: 700 feet. Highest point: 2,800 feet. Did you know? The initial gold and silver strike at Monte Cristo was backed by New York financiers with ties to John D. Rockefeller. GETTING THERE Barlow Pass trailhead: From Granite Falls, follow the Mountain Loop Highway (530) east for 30 miles.
Two old goats at the Windy Point overlook along the Iron Goat Trail: Jeff Whidden and myself.
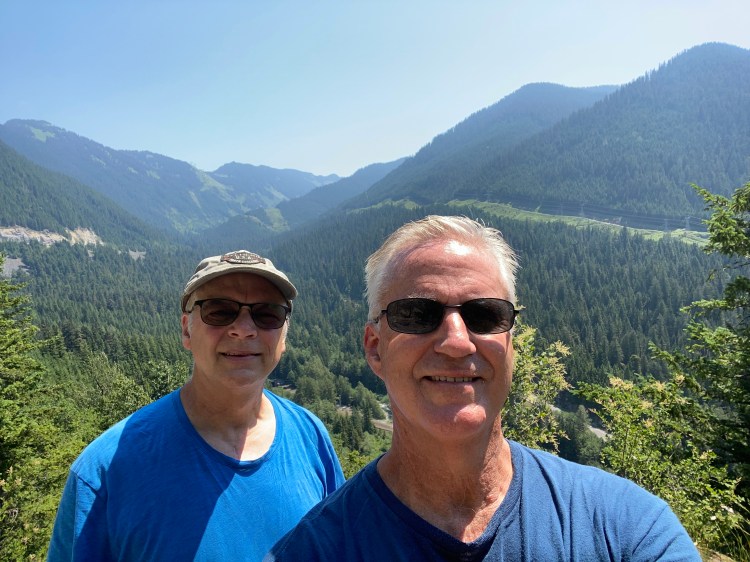
Bill Cheney and I along the well-worn path to the ghost town of Monte Cristo, just off the Mountain Loop Highway.
Some backpack equipment to consider for your next overnight trip. From left, in front of the lightweight, dome-shaped tent: “telescoping” trekking poles, freeze-dried pouches of food, an air insulated sleeping pad, a collapsible lightweight camp chair (optional), a water filtration device, a backpack to hold all your gear, a collapsible water bladder to store filtrated water at camp, lightweight collapsible cooking stove with liquid fuel canisters, and a lightweight cooking pot that holds a minimum of one quart of water. (Photo by Rick Lund)
I certainly don’t consider myself an expert on backpacking equipment. But I’ve hiked enough, and accummulated enough gear over the years to know what’s needed. I used an anecdote from a group hike with Jeff Whidden and other friends in the lead of the story. He/she will remain nameless. Would never want to embarrass him/her.
Here is the full version of my story that was published May 21 in The Seattle Times. The optional items were trimmed in the story that ran in print.
By Rick Lund Special to The Seattle Times
A few years ago, as we gathered at a meeting place for a group hike, one participant arrived with an army-style duffle bag that was supposed to serve as a backpack.
After looks of astonishment from everyone present, the leader of the group raced home and retrieved a spare backpack for the inexperienced hiker, most certainly saving that person from three days of hiking hell.
That’s a far-flung example of backpacking unpreparedness. But one can never assume first-time backpackers know what to bring on an overnight trek in the mountains.
Planning for a backpack trip should be similar to packing for a vacation trip or an even a simple trip to the grocery store. Make a list. Check it twice.
It’s also important to travel light. The weight of all the items adds up quickly in your backpack. What you think you need beforehand – multiple sets of clothing and non-essential food – might not seem like such a good idea in hindsight when you’re struggling up a steep trail in the heat of the day with an overloaded pack.
With that in mind, here’s a list of backpacking essentials, as well as some optional items, to bring on your trip:
ESSENTIALS
Backpack: Most are made of nylon with an internal frame made of steel. Sizes can range from 35-110 liters of gear capacity, and can weigh by themselves between 3-5 pounds.
Comfortable hiking boots or trail running shoes: Hiking boots will offer better ankle support, which is important on the trail.
Lightweight tent: Most backpacking tents are shaped like a dome and rely on crossing poles and guy lines to create a rigid frame. Two-person tents usually weigh between 2.5 and 5 pounds. One with a rainfly is recommended.
Down sleeping bag and compression stuff sack: Even in the middle of the summer, you might be surprised how cold it gets at night at higher elevations. It’s not uncommon to wake up to frost on the ground. Most backpacking sleeping bags weigh from 1.5 to 3 pounds.
Insulated sleeping pad: Your back will thank you for it. Trying to sleep on the hard ground, and quite possibly on a stray rock or two, is no fun. Air insulated sleeping pads don’t take up much space (many fold into a small stuff sack) and require a minimal amount of huffing and puffing to inflate.
Lightweight cooking stove and fuel: Don’t ever assume you can build a fire for cooking. Many wilderness areas prohibit campfires during hiking season. Most backpacking stoves are small, fold up easily and typically screw onto threaded tops of self-sealing, liquid fuel canisters.
Lighter to fire up the stove: A Bic lighter will do, or matches, as long as they’re protected from moisture.
Water bottles: You’d be surprised how easily you can become dehydrated along the trail, especially when it’s hot. You’ll know it when your leg muscles begin to cramp. Make sure your water bottles together hold a minimum of 2 liters of water for the trail. Keep them handy so they’re easily accessible for frequent water breaks. Also, know ahead of time where the water sources are along the trail for filtering.
Lightweight cooking pot: A pot holding one or two quarts is ideal for boiling water for a small hiking party at the campsite.
Food: Freeze-dried food has come a long way over the years. It’s light, doesn’t take up much room and requires just adding water. “Mountain House” and “Backpacker’s Pantry” are two of the more popular brands, and can be purchased at most outdoor outlets. For something more higher end, “PackitGourmet” can be ordered online. Beyond freeze-dried food, items such as bagels, mixed nuts, dried fruit, beef jerky, granola bars and granola cereal and instant oatmeal don’t take up much room, and can also be good snacks for rest breaks along the trail. Hot-chocolate mix and powdered juice mix add a little variety to water.
Water filtration device: For drinking water, it’s essential to have some sort of water filtration system to remove bacteria and giardia from the water you obtain along the trail. A pump system, a “squeeze bag” setup or a gravity filter method are among the most popular ways to move water through a microfilter. Bacteria can also be removed with iodine pills.
Collapsible water bladder or bag: For filtered water storage at your campsite. You’ll go through a lot of water for cooking, drinking and washing dishes. A bladder that holds about 6 liters of water is a good capacity.
Trekking poles: Not only are they good for balance along the trail, but they provide essential balance support when you’re walking across a fallen log or boulder-hopping a stream.
Weather-appropriate clothing: Think of the old Scandinavian mantra: “There’s no such thing as bad weather, only bad clothes.” Make sure you have quick-drying nylon long pants, a lightweight raincoat or poncho, a stocking cap and fleece gloves for cold nights (for high-elevation hikes), a light wool or fleece sweater, a synthetic long-sleeved shirt, and hiking shorts if you’re expecting hot weather. An extra pair of socks, underwear and a fleece or wool pants for the night are also recommended.
Insect repellant: Mosquitoes and deer flies are plentiful in the mountains, and can make your life miserable. Insect repellant with a minimum 40 percent of DEET (if you’re comfortable with that) helps ward off the pesky flies. If you’re really bothered by biting bugs, a mosquito head net with an insect shield is recommended.
Sunblock and sunglasses: The sun can be intense in the mountains. It doesn’t take much to get a sunburn, especially if you’re walking on snow.
First-aid kit: Always a good idea, even if it’s a minor cut from falling along the trail.
A small flashlight or headlamp: If for whatever reason you must hike at night, or to navigate your campsite after dark, this is another essential item.
A map and compass: Most U.S. Forest Service Ranger stations have hiking maps for their region. Topographical “Green Trail” maps can also be purchased at many outdoor retail outlets. For phone-based navigation, “Maps.Me” and “Gaia GPS” are useful apps. But you’ll want to download a map of the area you’re traveling to prior to your trip since there’s a good chance you won’t have cell service on the trail.
50 feet of rope or utility cord: You’ll want to hang your food at night in a tree in a stuff sack or plastic bag to keep the bears and other critters from eating your provisions. Storing food at night in your tent is an open invitation to them to come and visit you.
A plastic hand shovel and bio-degradable toilet paper: Select a site at least 200 feet from a water source whenever possible. Bury waste in a hole three- to six-inches deep and cover with soil. Use backcountry toilets whenever possible. Where toilets are not available and digging is not possible, such as sub-alpine areas, snow, rock or glaciers, pack out waste.
Permit: A federal Northwest Forest Pass is required to park at most trailheads on Forest Service trails, a backcountry permit is required on many national park trails, and a Discover Pass at some lower-elevation trails, particularly at state parks. You don’t want to return to your vehicle to find a ticket on your windshield.
OPTIONAL
Camera: One with a telephoto lens that’ll get you closer than what your smartphone can offer.
Teva-style sandals: Always feels good to take off the dusty, sweaty hiking boots and slip into something more comfortable at the campsite.
Lightweight rain pants: If you’re expecting rainy weather.
Swimsuit: Nothing like taking a dip in a stream or alpine lake (if you can stand the cold temperature!) in the afternoon to wash off the dirt and grime from the trail.
Insulated vest or light jacket: If you get cold easily.
Duct tape: It can come in handy. Some hikers store it by wrapping a small roll around a trekking pole.
Lightweight camp chair: There are no picnic tables at mountain-trail campsites. You’re lucky to find a log to sit on. If you’re looking for a little more comfort and willing to pack an extra 2 pounds or so, a compact, a collapsible chair will fold into a fairly small bag to place in your backpack.
Lastly, you should always let someone know when you’re going and when you plan to be back. And don’t assume you can make a call on your cell phone if you’re lost, stranded or running behind schedule. Cell service is virtually non-existent, or at best spotty, in the mountains. It’s also a good idea to document your start date, expected return date and the number of people in your hiking party at the “sign-in” sheets, which are posted at many trailheads.
Rick Lund is a former Times assistant sports editor
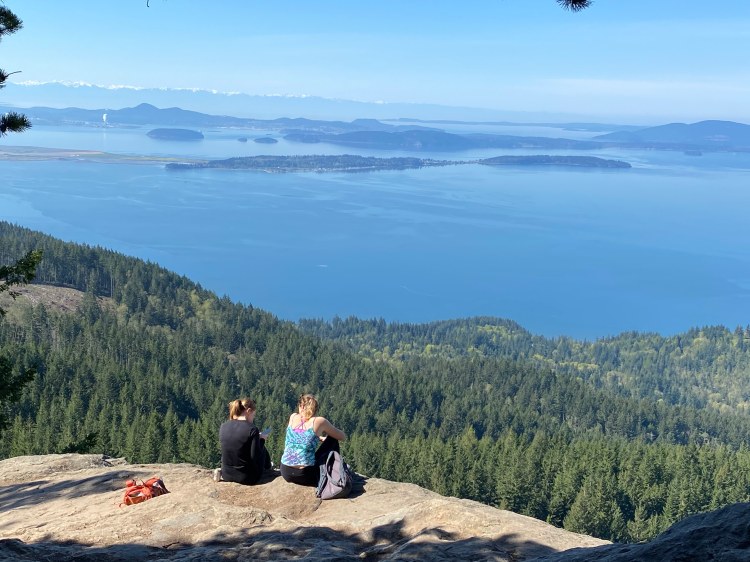
A couple day hikers take a break on top of Oyster Dome. The view below is of Samish Bay, Samish Island, Anacortes, and the San Juan Island. Way in the distance are the Olympic Mountains.
When I was a young boy, our family would occasionally make our way up Chuckanaut Drive after church to have Sunday dinner at the Oyster Bar.
The Oyster Bar back then wasn’t anything like today version, which is gourmet and pricey, a restaurant you’d go to celebrate a special occasion, like your wedding anniversary.
The “original” Oyster Bar was more like Ivar’s Salmon House light. It had more of a casual dining feel. Your modestly-priced dinner — oysters, breaded prawns or fish and chips were the usual main fare – arrived on a plain, dinner plate, not the fancy china delivered to your table today. It always came with a crab cocktail appetizer, which I still remember today as very tasty.
But what was really memorable were the words prominently printed on the menu:
“The oysters you eat today, slept last night in Samish Bay.”
Little did I know then a trailhead just across the road from the restaurant led to a rocky vista that looked down on Samish Bay and the surrounding Salish Sea … before it was called the Salish Sea. The final destination on the trail is appropriately called Oyster Dome.
I hiked that trail for the very first time last week. Don’t know why it took me so long. It’s one of the low-elevation, spring hikes I’ve recommended for a story that will be published soon in The Seattle Times.
Oyster Dome
The shallow, firm-bottomed waters of Samish Bay are ideal for growing oysters. No surprise the northern shores of the bay are home to a shellfish farm, and a longtime oyster-specialty restaurant just up the hill on scenic Chuckanut Drive in its early days touted this memorable slogan:
“The oysters you eat today, slept last night in Samish Bay.”
The pearl of this oyster haven looms high overhead. It’s Oyster Dome, a rocky promontory on the western slope of Blanchard Mountain and the pride of the Chuckanut Mountain range.
And when it comes to day hikes, unlike the oysters below, don’t sleep on this one. The views of the Salish Sea from 2,025-foot Oyster Dome are jaw dropping.
To the left is the Skagit River flats, Samish Island, Guemes Island, Anacortes, and Mount Erie near Deception Pass. To the right is the south end of Lummi Island, and straight ahead, the San Juan Islands. Orcas Island is particularly conspicuous among the islands, thanks in part to Mount Constitution, which pokes just 373 feet higher than Oyster Dome.
Framing all this way in the background are the snowcapped Olympic Mountains.
It’s best to begin the hike at the Samish Outlook parking area on Blanchard Mountain. From the trailhead, you’ll start on a section of the Pacific Northwest Trail, descending slightly for 0.4 of a mile before the junction with the Samish Bay connector and trail to Chuckanut Drive.
At this point, give yourself a high five. Not only have you saved time and nearly 1,000 feet of elevation gain by not starting on Chuckanut Drive, the alternative trailhead, your vehicle also isn’t precariously parked on the shoulder of the busy road.
The rest of the 2.5-mile ascent to Oyster Dome is fairly gentle. At about the 2-mile mark you’ll come to a junction for the trail to nearby Lily and Lizard lakes, a camping option for the overnight backpacker.
A final scramble up the hill lands you upon Oyster Dome. Take a break, have lunch, watch an occasional bald eagle fly by, and take in the breathtaking views.
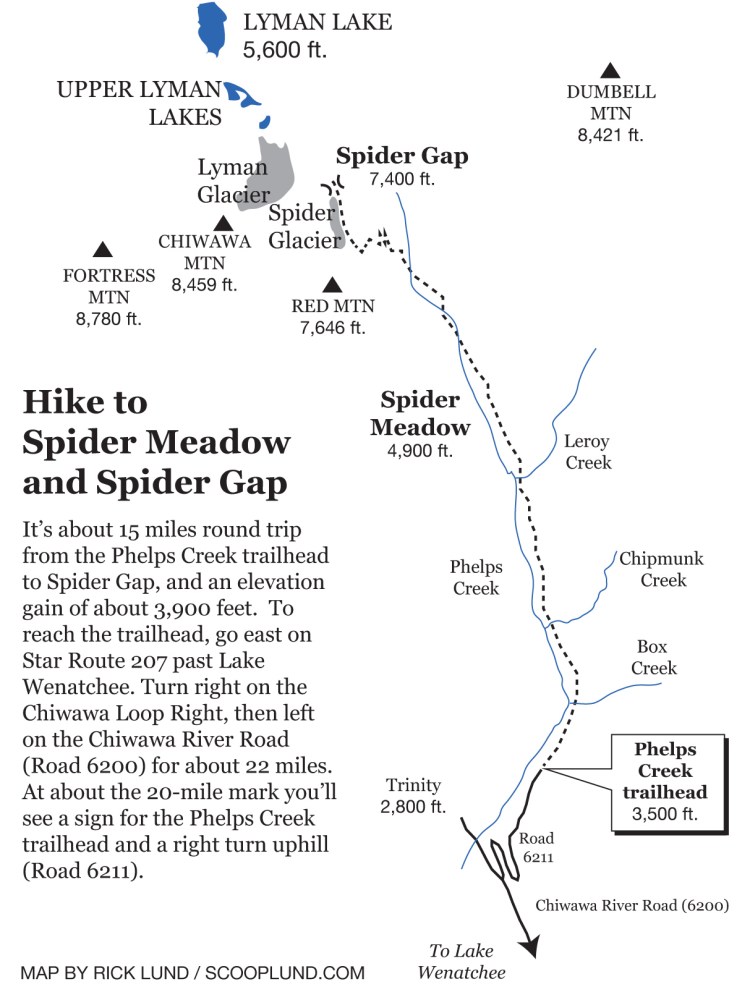
My third hike to spectacular Spider Meadow in the central Cascades, which turned out to be a passing of the baton to my grandson, Isaac Richardson
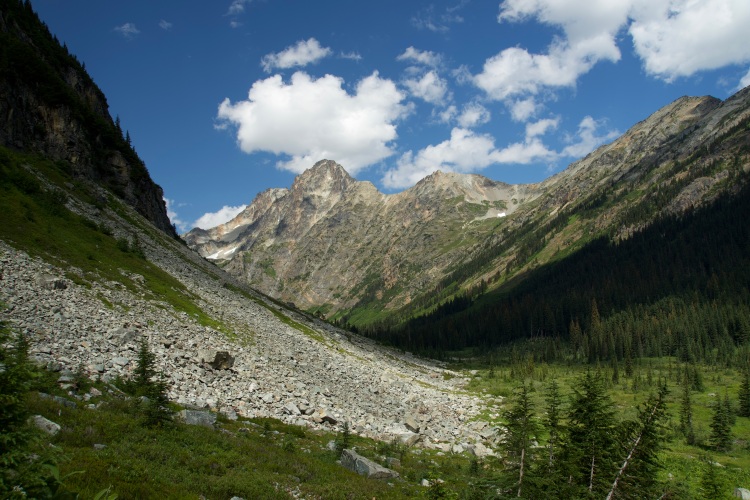
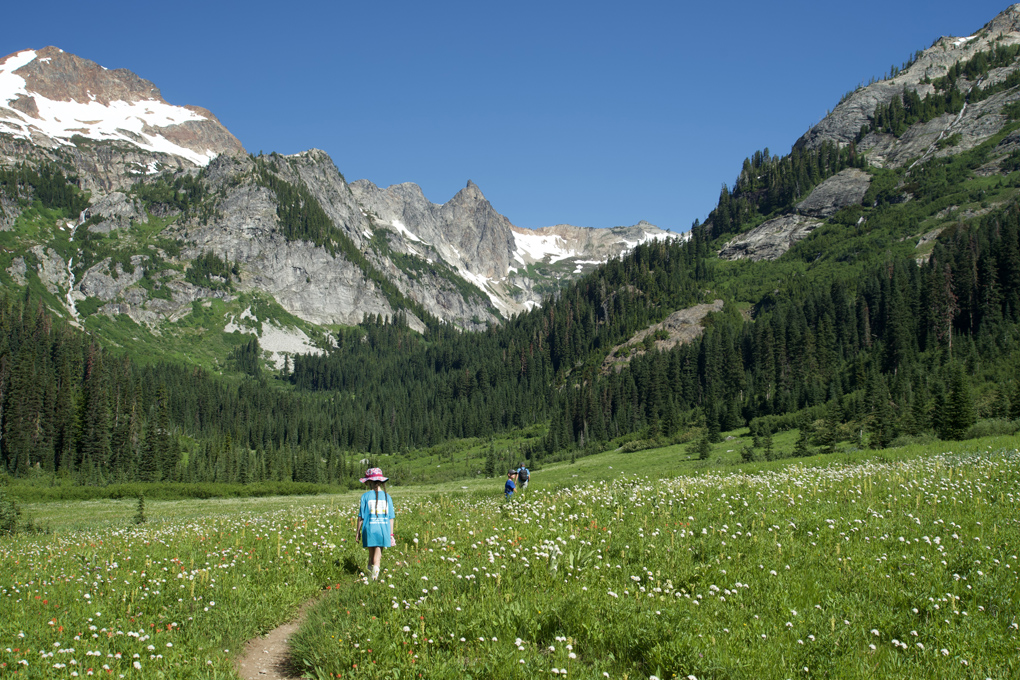
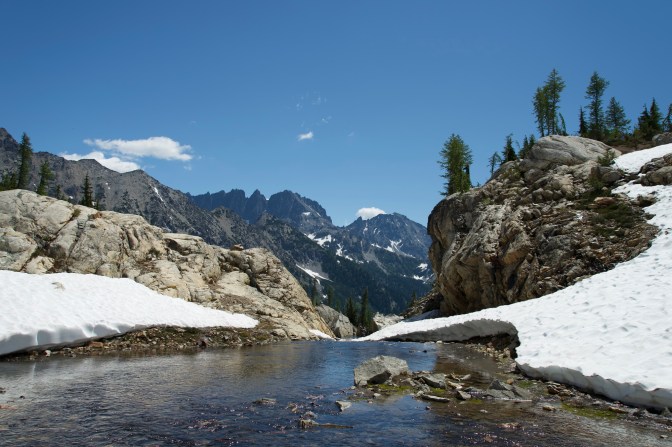
Looking down at the U-shaped valley that frames Spider Meadow, with Phelps Ridge, Mount Maude and Seven-Fingered Jack in the background (Photo by Rick Lund)
It was supposed to be a story about backpacking in the era of COVID-19. At least that’s how I originally pitched it to an editor at The Seattle Times in the summer of 2020. There was only one problem: No official at the Wenatchee Ranger Station, which oversees the trail to Spider Meadow, wanted to talk to me.
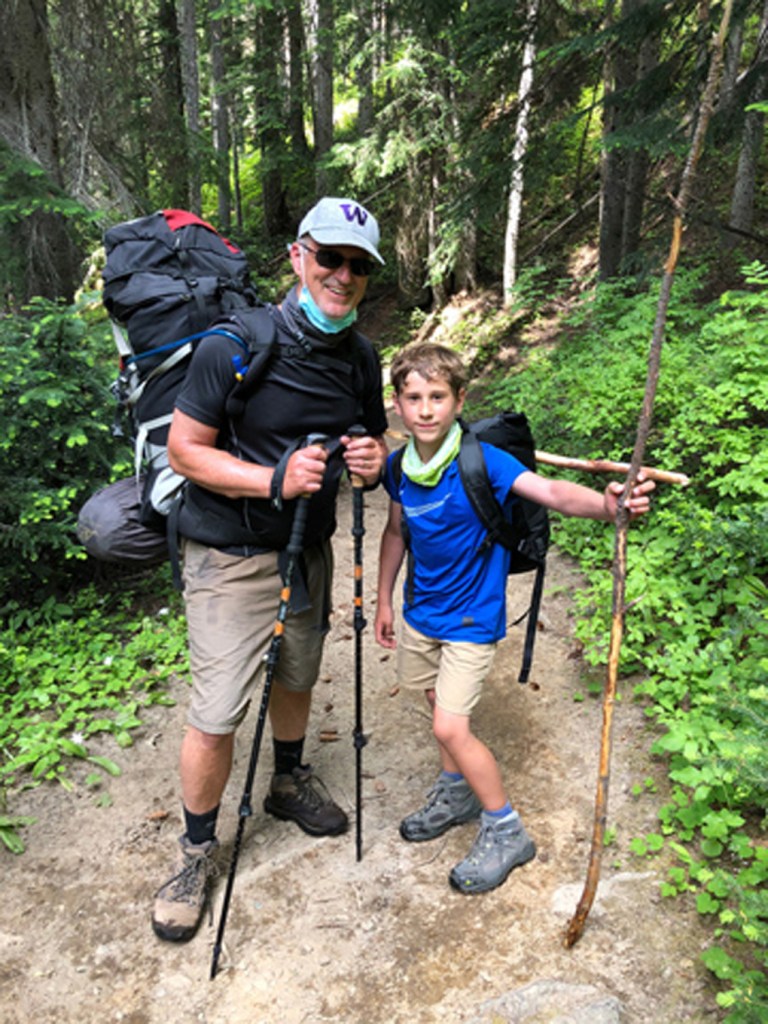
Rick Lund and Issac Richardson (Photo by Peter Richardson)
And that was a bit unusual, because PR folks at the U.S. Forest Service have always been cooperative when I’ve asked follow-up questions for backpacking stories. But as I would surmise later, it wasn’t that they didn’t want to talk about backpacking safety in the mountains during the pandemic. Rather, it was they didn’t want to talk about Spider Meadow — already a widely-popular trail — and my story that would run online and in the printed Sunday Seattle Times in mid-August was about to make the situation worse.
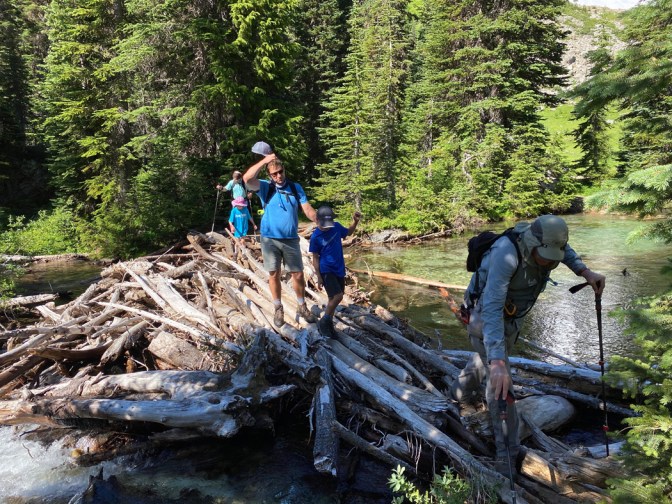
So I pivoted to another angle, which was really the reason I planned this hike in the first place: The opportunity to hike with my longtime friend and hiking partner Bob Swenson, my son-in-law, Peter Richardson, and his 8-year-old son, Isaac, in what would be his backpacking debut. Peter’s friend, Karl Olson, and his 8-year-old daughter, Juniper, joined us for the three-day trek.
The trip would be an overnight (make that two) success. Any fears that Isaac or Juniper weren’t tough enough to carry a backpack up a steepening trail were quickly erased on the first day. We had perfect weather all three days, interesting conversations along the trail (one of my favorite aspects of backpacking) and a great time.
My first of three trips to Meadow Spider was in 2007 with my youngest daughter, Greta. So our recent trek there represented a passing-of-the-next-generation-torch to my grandson, Isaac, who I am very confident will become a backpacking enthusiast. It was an experience I’ll certainly never forget. And I don’t think Isaac will either. I hope for him it was the first of many backpacking adventures.
Spider Meadow numbers
Miles from trailhead
Elevation
Phelps Creek trailhead
3,500 feet
Spider Meadow
4.5
4,900 feet
Spider Gap
7.5
7,400 feet
Source: Wenatchee Ranger station
Here’s a link to my story that ran in The Seattle Times on August 16.